Fudgy Discard Brownies With Cocoa
Highlighted under: Classic Baking Ideas
When I first tried making these fudgy brownies using sourdough discard, I was amazed at how rich and decadent they turned out. Not only did the discard lend a slight tanginess that balanced the chocolate flavor perfectly, but it also resulted in a wonderfully moist texture. Each bite feels like a hug, and I love that I can create something so delicious while minimizing food waste. This recipe has quickly become a favorite in my home, and I can't wait for you to try it too!
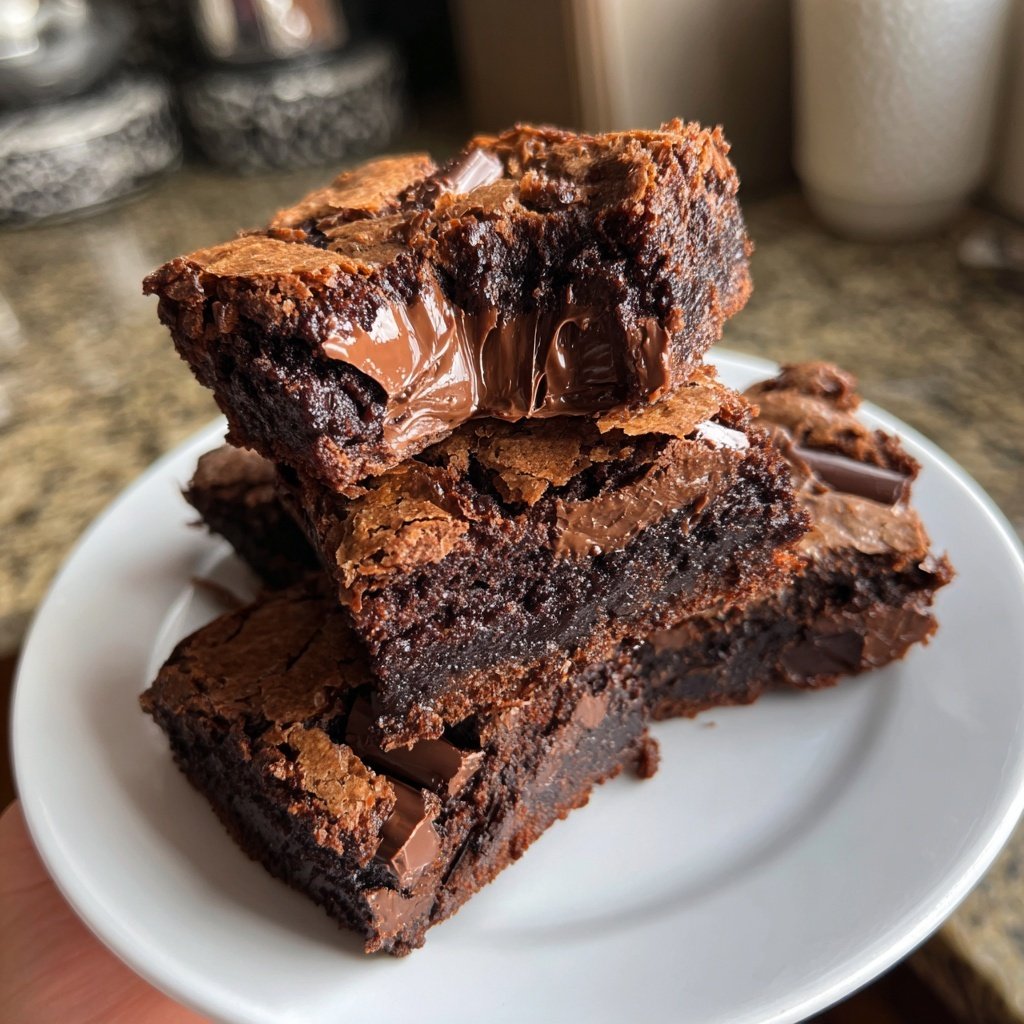
After experimenting with sourdough discard in various recipes, I decided to take a plunge into creating brownies. I was pleasantly surprised by the results and learned that the acidity in the discard enhances the chocolate flavor while keeping the brownies incredibly fudgy. When I baked them, the aroma that filled my kitchen was irresistible, drawing in my family as they eagerly anticipated dessert.
What made this recipe stand out for me was the use of both cocoa powder and chocolate chips. The combination created a double-chocolate experience that was indulgent without being overtly sweet. I also discovered that mixing the batter by hand helps retain some air, resulting in a perfect balance of fudgy and chewy textures that I just adore.
Why You'll Love These Brownies
- Rich and fudgy with a delightful chocolate flavor
- Perfect use of sourdough discard to minimize waste
- A unique twist on traditional brownies that everyone will adore
Understanding Sourdough Discard
Using sourdough discard in these brownies not only reduces food waste but also adds a unique flavor profile. The slight tang from the discard enhances the chocolate, creating a rich and complex taste that's more exciting than standard brownies. If you're new to using sourdough discard, remember that it can vary in acidity depending on how long it has been stored. A slightly more fermented discard will yield a more pronounced tang, which some may enjoy, while a fresher discard will impart subtler notes.
Sourdough discard also contributes to moisture, helping to achieve that fudgy texture we all love. The acidity in the sourdough interacts with the baking powder, which can lead to a lighter crumb inside while maintaining a dense outer layer. If you happen to have excess discard, you can freeze it in portions for later use, ensuring you always have some available for these delightful brownies.
Perfecting Fudgy Texture
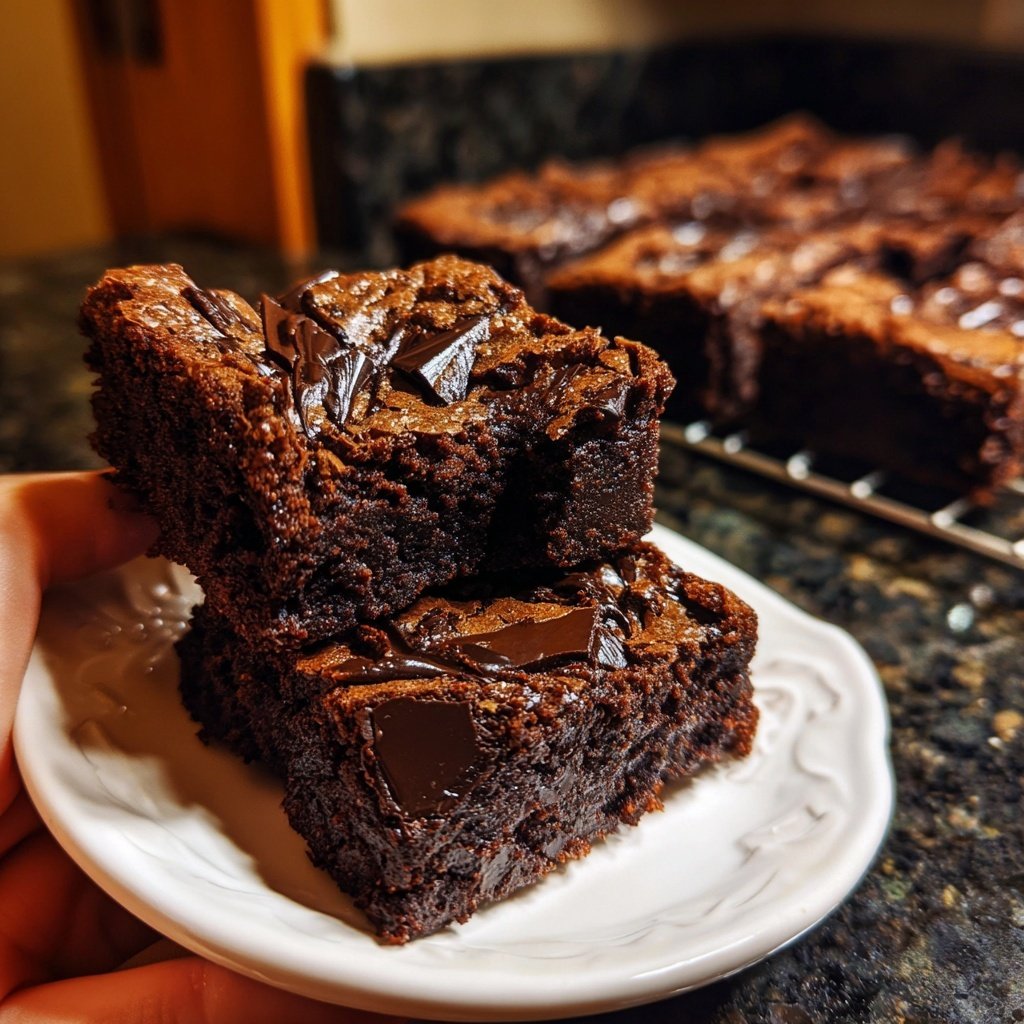
To maintain the wonderfully fudgy texture of these brownies, it's essential to avoid overmixing your batter once you combine the wet and dry ingredients. Overmixing can introduce excess air, leading to a cakier product. Stir gently until just combined, and you’ll achieve that classic brownie density. You'll know it's done right when the batter is thick and glossy, ready to be poured into the baking pan.
Baking time can also affect the final texture. For a more fudgy brownie, aim for the lower end of the baking range; 25 minutes should bring you close. The brownies should look set at the edges with a slightly soft center, which is a sign of fudginess. A toothpick inserted should reveal a few moist crumbs, indicating they are perfectly baked.
Storing and Serving Your Brownies
Once your brownies have cooled, store them in an airtight container at room temperature for up to four days. To maintain moisture, you can layer parchment paper between the brownies, preventing them from sticking together. If you want to keep them longer, consider freezing them. Cut the brownies into squares and wrap them tightly in plastic wrap followed by foil, which can keep them fresh for up to three months. Thawing is easy; just let them sit at room temperature for about an hour before enjoying.
These brownies are versatile when it comes to serving. For an indulgent dessert, serve them warm, topped with a scoop of vanilla ice cream and a drizzle of chocolate sauce. You can also experiment with mix-ins like nuts or dried fruit, or even swirl in some peanut butter or caramel for an extra layer of flavor. The possibilities are endless!
Ingredients
Gather these ingredients to get started:
Brownie Ingredients
- 1 cup sourdough discard
- 1/2 cup unsalted butter, melted
- 1 cup granulated sugar
- 2 large eggs
- 1 tsp vanilla extract
- 1/2 cup all-purpose flour
- 1/2 cup unsweetened cocoa powder
- 1/2 tsp baking powder
- 1/4 tsp salt
- 1/2 cup chocolate chips
Make sure everything is measured accurately for the best results!
Instructions
Follow these steps to bake your brownies:
Preheat the Oven
Preheat your oven to 350°F (175°C) and grease a 9x9 inch baking pan or line it with parchment paper.
Mix Wet Ingredients
In a mixing bowl, combine the melted butter, sourdough discard, sugar, eggs, and vanilla extract. Whisk until smooth.
Combine Dry Ingredients
In another bowl, whisk together the flour, cocoa powder, baking powder, and salt until well mixed.
Combine Wet and Dry Mixtures
Gradually add the dry ingredients to the wet mixture, stirring just until combined. Avoid overmixing.
Add Chocolate Chips
Fold in the chocolate chips until evenly distributed throughout the batter.
Bake the Brownies
Pour the batter into the prepared baking pan and smooth the top. Bake for 25 minutes, or until a toothpick inserted into the center comes out with a few moist crumbs.
Cool and Serve
Allow the brownies to cool in the pan for at least 15 minutes before cutting into squares and serving.
Enjoy your delicious brownies!
Pro Tips
- For an extra touch, consider sprinkling some sea salt on top right before baking. It enhances the chocolate flavor beautifully!
Ingredient Substitutions
If you're in need of a dairy-free option, you can substitute the unsalted butter with a plant-based alternative such as coconut oil or vegan butter. Both will deliver similar richness while making these brownies accessible for lactose-intolerant individuals. Additionally, using flax eggs (1 tablespoon of ground flaxseed mixed with 2.5 tablespoons of water per egg) can replace the eggs for a vegan version—just make sure to let the mixture sit for a few minutes to thicken before adding it to the batter.
For a gluten-free version, swap the all-purpose flour with a gluten-free 1:1 baking flour blend. Many of these mixes contain xanthan gum, which helps the brownies maintain their structure. However, if your blend doesn’t include it, consider adding a teaspoon to improve texture and prevent crumbliness.
Troubleshooting Common Issues
One common challenge with brownies is overbaking. If the edges have hardened or become too dark while the center remains gooey, you may be baking them at too high a temperature or too long. Investing in an oven thermometer can help ensure your oven is at the correct temperature, providing more consistent baking results. If you find yourself with dry brownies, adding an extra tablespoon of sourdough discard next time can help retain moisture.
If your brownies are falling apart rather than cutting cleanly, they may need more cooling time. Allowing them to rest for at least 15 minutes in the pan helps them firm up. If they still crumble, try letting them chill in the fridge for an additional 30 minutes before slicing. This can help enhance the fudgy texture and make cutting easier.
Variations to Try
These fudgy brownies can easily be customized to suit your taste preferences. Consider adding a pinch of espresso powder to intensify the chocolate flavor, or incorporate some orange zest for a refreshing citrus twist. You can also experiment by adding flavored chocolate chips—like mint or sea salt caramel—for an exciting contrast. These variations can transform the basic recipe and give you a delightful experience each time.
For an even more unique presentation, try making brownie sundaes. Cut the cooled brownies into larger squares and layer them with whipped cream, nuts, and a cherry on top. This not only makes for a beautiful dessert but also offers a fun treat for gatherings or parties. The pairing of fudgy brownies with creaminess creates a delightfully indulgent experience.
Questions About Recipes
→ Can I use any type of sourdough discard?
Yes, any sourdough discard will work, just ensure it is not overly sour.
→ Can these brownies be frozen?
Absolutely! Wrap them well and freeze for up to 3 months. Just thaw before enjoying.
→ What can I use instead of butter?
You can use melted coconut oil or a dairy-free butter substitute for a vegan option.
→ Can I add nuts or other mix-ins?
Certainly! Walnuts, pecans, or dried fruit can add a delightful crunch and flavor.
Fudgy Discard Brownies With Cocoa
Created by: Tabitha Collins
Recipe Type: Classic Baking Ideas
Skill Level: Intermediate
Final Quantity: 16 brownies
What You'll Need
Brownie Ingredients
- 1 cup sourdough discard
- 1/2 cup unsalted butter, melted
- 1 cup granulated sugar
- 2 large eggs
- 1 tsp vanilla extract
- 1/2 cup all-purpose flour
- 1/2 cup unsweetened cocoa powder
- 1/2 tsp baking powder
- 1/4 tsp salt
- 1/2 cup chocolate chips
How-To Steps
Preheat your oven to 350°F (175°C) and grease a 9x9 inch baking pan or line it with parchment paper.
In a mixing bowl, combine the melted butter, sourdough discard, sugar, eggs, and vanilla extract. Whisk until smooth.
In another bowl, whisk together the flour, cocoa powder, baking powder, and salt until well mixed.
Gradually add the dry ingredients to the wet mixture, stirring just until combined. Avoid overmixing.
Fold in the chocolate chips until evenly distributed throughout the batter.
Pour the batter into the prepared baking pan and smooth the top. Bake for 25 minutes, or until a toothpick inserted into the center comes out with a few moist crumbs.
Allow the brownies to cool in the pan for at least 15 minutes before cutting into squares and serving.
Extra Tips
- For an extra touch, consider sprinkling some sea salt on top right before baking. It enhances the chocolate flavor beautifully!
Nutritional Breakdown (Per Serving)
- Calories: 250 kcal
- Total Fat: 14g
- Saturated Fat: 8g
- Cholesterol: 45mg
- Sodium: 45mg
- Total Carbohydrates: 30g
- Dietary Fiber: 2g
- Sugars: 20g
- Protein: 3g