Homemade Peanut Butter Cups with Dark Cocoa
Highlighted under: Classic Baking Ideas
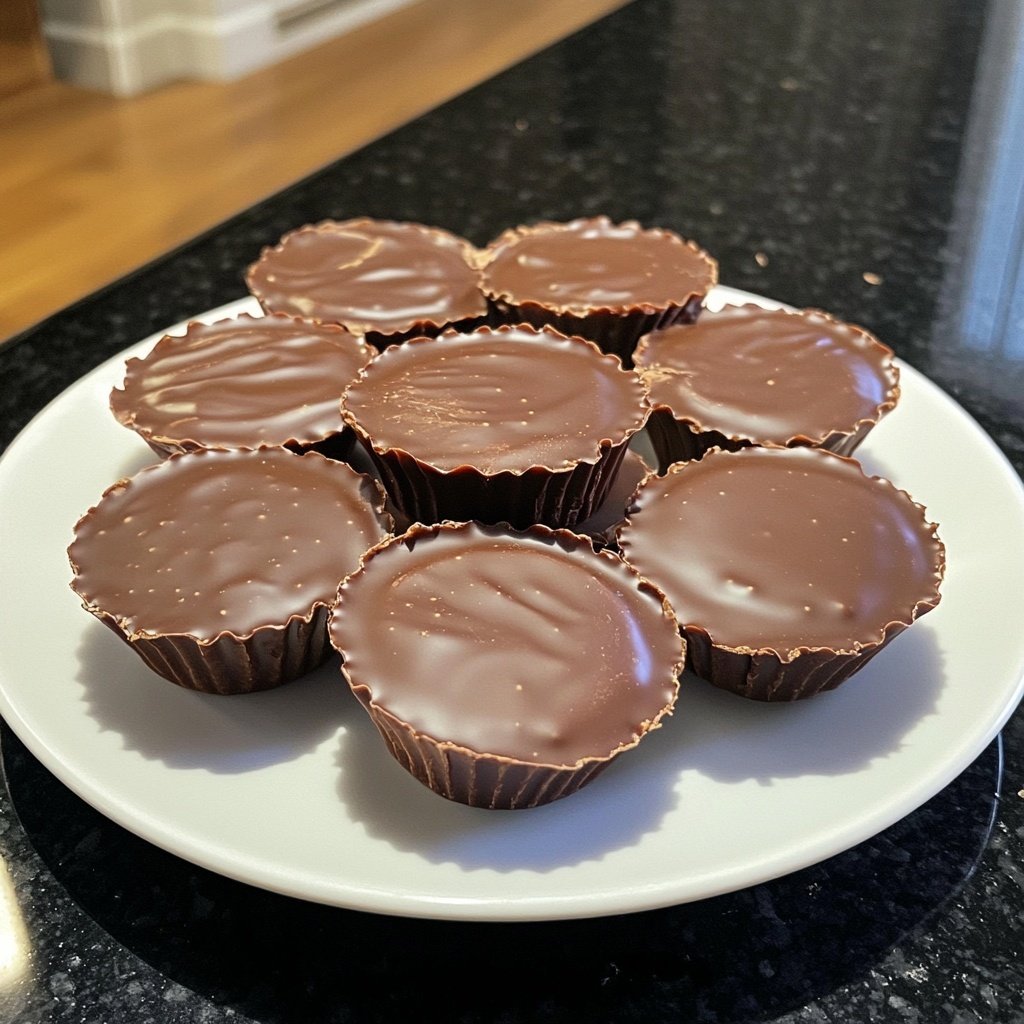
I love making homemade treats, and these Peanut Butter Cups with Dark Cocoa have quickly become a favorite in my house. The contrast between the rich, dark cocoa and the smooth, creamy peanut butter filling is just unbeatable. Not only are they easy to whip up, but they also satisfy my sweet tooth without being overly indulgent. I often make a batch to share with friends, and they always leave raving about how simple yet delicious they are. These cups are my go-to for a quick dessert or afternoon snack when I need a little pick-me-up.
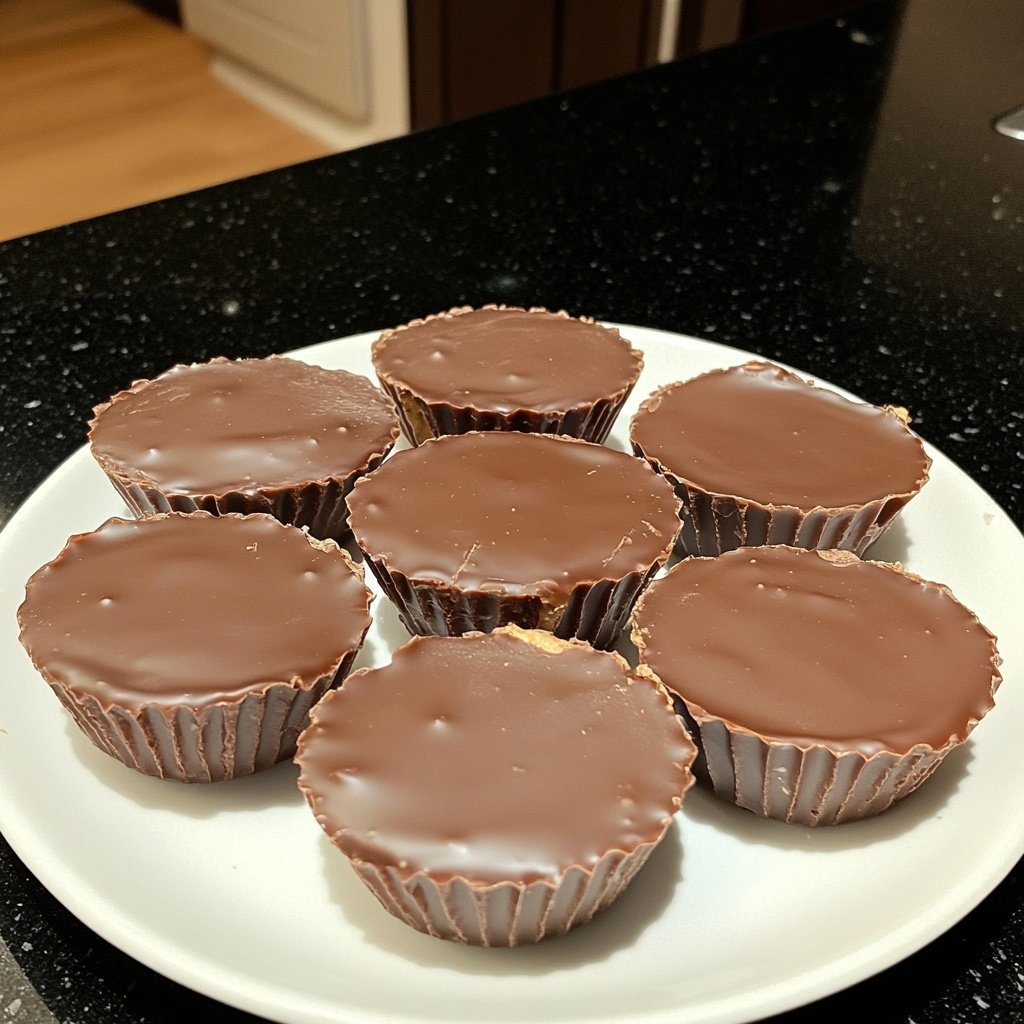
When I first attempted to make my own peanut butter cups, I was surprised at how straightforward the process was. I experimented with different types of chocolate, but the dark cocoa really adds a depth of flavor that complements the peanut butter perfectly. I found that melting the cocoa with coconut oil creates a beautiful, shiny finish once cooled, making for a gorgeous presentation.
One little tip I picked up along the way is to freeze the peanut butter layer before adding the cocoa layer. This helps maintain distinct layers and gives the cups a firmer texture. It's these small adjustments that turn a simple recipe into something truly special!
Reasons to Love This Recipe
- Rich chocolate flavor paired with fresh peanut butter filling
- Creamy texture that melts in your mouth
- Perfect for satisfying sweet cravings with minimal effort
Choosing the Right Chocolate
The type of chocolate you use for your Peanut Butter Cups plays a crucial role in achieving that rich flavor. I recommend using high-quality dark chocolate chips, which typically contain 50-60% cocoa. This percentage balances sweetness and bitterness, enhancing the overall taste. If you prefer a sweeter profile, opt for semi-sweet chocolate; it will add a different dimension to the cups while still delivering on the chocolatey goodness.
When melting the chocolate, it's essential to do so at a low temperature to prevent burning. Using a microwave, heat the chocolate in 30-second intervals, stirring after each, until glossy and smooth. If your chocolate is seizing up or becomes grainy, it may have overheated. A splash of coconut oil can help restore smoothness, making it easier to work with.
Perfecting the Peanut Butter Filling
The balance of the peanut butter filling is key to these cups. I use creamy peanut butter for a smooth texture, but if you prefer a chunkier filling, natural peanut butter works well too. Just make sure it’s not too oily; if it is, adjusting with a bit more powdered sugar can stabilize the mixture. Combining the ingredients until perfectly smooth enhances the final mouthfeel, as any lumps can disrupt the enjoyment of each bite.
If you’re looking to reduce sugar, consider using a sugar-free powdered sweetener, which can provide a similar sweetness without the extra calories. Just keep in mind that some sugar substitutes may alter the texture slightly, so you might need to adjust the peanut butter quantity for the right consistency.
Storing and Serving Your Peanut Butter Cups
Once your Homemade Peanut Butter Cups are set, they can be stored in an airtight container in the refrigerator for up to two weeks. If you made a large batch, they also freeze well, allowing you to enjoy them later. Just place them in a single layer in a plastic container and separate each layer with parchment paper. When you’re ready to indulge, let them thaw at room temperature for about 10-15 minutes; they will taste just as fresh as the day you made them.
For serving, you can enhance the presentation by drizzling a bit of melted chocolate on top or sprinkling with flaky sea salt for added flavor and visual appeal. These cups also pair wonderfully with a scoop of ice cream or a glass of milk, making them suitable for various occasions, from simple snacks to dessert after dinner.
Ingredients
For the Peanut Butter Cups
- 1 cup dark chocolate chips
- 1/2 cup creamy peanut butter
- 1/4 cup powdered sugar
- 2 tablespoons coconut oil
- 1/2 teaspoon vanilla extract
- Pinch of salt
Make sure to use high-quality chocolate for the best flavor!
Instructions
Prepare the Chocolate Layer
Melt the dark chocolate chips and coconut oil together in a microwave-safe bowl in 30-second intervals, stirring in between until smooth.
Fill the Molds
Spoon a layer of the melted chocolate into the bottom of silicone cups, filling them about a third of the way. Place them in the fridge for 10 minutes to set.
Make the Peanut Butter Filling
In a mixing bowl, combine the peanut butter, powdered sugar, vanilla extract, and salt. Mix until smooth and creamy.
Add the Peanut Butter Layer
Once the chocolate layer has set, remove the molds from the fridge. Spoon a layer of the peanut butter mixture on top of the chocolate layer, filling each cup about two-thirds full.
Seal with Chocolate
Top each cup with the remaining melted chocolate, ensuring the peanut butter is completely covered. Return to the fridge for another 15 minutes to set fully.
Serve
Once set, pop the cups out of the molds and enjoy your homemade peanut butter cups!
Store leftovers in an airtight container in the refrigerator.
Pro Tips
- Use different types of nut butter like almond or cashew for a unique twist on this classic treat.
Variations to Explore
Feel free to experiment with the filling by incorporating different flavors. Adding a dash of cinnamon or a teaspoon of maple syrup can bring a delightful twist to the classic peanut butter taste. For a chocolate-peanut butter hybrid, consider mixing in some cocoa powder with the peanut butter filling. This will deepen the flavor and satisfy any chocolate lover’s craving even more.
You can also mix in or top off the filling with mini chocolate chips or crushed nuts for added texture. These small tweaks can transform your Peanut Butter Cups into an indulgent treat tailored specifically to your taste.
Troubleshooting Common Issues
If your chocolate layer doesn’t set properly, it may be due to excess moisture or heat during melting. Ensuring your mixing bowl is completely dry and using the microwave in short bursts can help avoid this. Additionally, setting the cups in the coldest part of your fridge can facilitate faster setting; aim for at least 15 minutes, but check for a firm, set surface.
If the peanut butter filling is too runny, consider adding more powdered sugar or chilling it before assembly. Conversely, if it's too thick, a touch of melted coconut oil can help smooth it out. Being patient during the mixing stage will allow you to achieve the perfect consistency for layering.
Questions About Recipes
→ Can I use natural peanut butter?
Yes, but be aware that natural peanut butter may be runnier. You might need to adjust the powdered sugar to achieve the right consistency.
→ How should I store these peanut butter cups?
Store them in an airtight container in the fridge. They can also be frozen for longer storage.
→ Can I add toppings to the cups?
Absolutely! Consider adding crushed nuts, sea salt, or even a sprinkle of flaky salt on top before they set.
→ What kind of chocolate can I use?
Feel free to use milk chocolate or white chocolate instead of dark, but remember that this will change the flavor profile.
Homemade Peanut Butter Cups with Dark Cocoa
Created by: Tabitha Collins
Recipe Type: Classic Baking Ideas
Skill Level: Beginner
Final Quantity: 12 cups
What You'll Need
For the Peanut Butter Cups
- 1 cup dark chocolate chips
- 1/2 cup creamy peanut butter
- 1/4 cup powdered sugar
- 2 tablespoons coconut oil
- 1/2 teaspoon vanilla extract
- Pinch of salt
How-To Steps
Melt the dark chocolate chips and coconut oil together in a microwave-safe bowl in 30-second intervals, stirring in between until smooth.
Spoon a layer of the melted chocolate into the bottom of silicone cups, filling them about a third of the way. Place them in the fridge for 10 minutes to set.
In a mixing bowl, combine the peanut butter, powdered sugar, vanilla extract, and salt. Mix until smooth and creamy.
Once the chocolate layer has set, remove the molds from the fridge. Spoon a layer of the peanut butter mixture on top of the chocolate layer, filling each cup about two-thirds full.
Top each cup with the remaining melted chocolate, ensuring the peanut butter is completely covered. Return to the fridge for another 15 minutes to set fully.
Once set, pop the cups out of the molds and enjoy your homemade peanut butter cups!
Extra Tips
- Use different types of nut butter like almond or cashew for a unique twist on this classic treat.
Nutritional Breakdown (Per Serving)
- Calories: 150 kcal
- Total Fat: 10g
- Saturated Fat: 5g
- Cholesterol: 0mg
- Sodium: 50mg
- Total Carbohydrates: 13g
- Dietary Fiber: 1g
- Sugars: 9g
- Protein: 3g